Installing a snow blade on a lawn tractor is a practical way to manage winter snow removal. The Grounds Guys provide a step-by-step guide to ensure safe and effective installation:
|
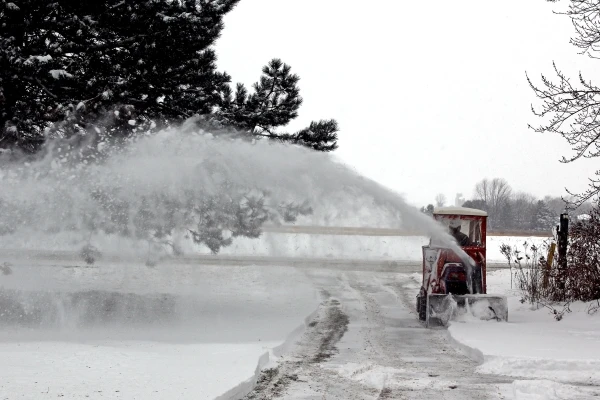
Depending on where you live, dealing with winter weather in Canada comes with a variety of unique challenges. You may have noticed during the last snowfall some people driving through your neighbourhood with a plow attached to their truck or tractor. This may have got you thinking about purchasing a snow blade for your lawn tractor. Even though it may come with an installation manual, some advice and safety tips before you get started might also be helpful. Things like how to size snow blades or plowing snow with a rear blade tractor you won’t find in an owner’s manual. So, let’s review how to choose and install a snow blade on a lawn tractor so you’re ready to tackle that next winter storm.
Sizing Your Snow Blade
Depending on the size of your tractor there are several different blade options available.
For smaller, compact tractors of 30 HP and under — clamp on, universal quick attach, Euro Hitch, or select John Deere and Kubota quick attach mounts usually work best. These blades feature manual angling and are available in several different sizes.
For larger tractors that are between 31 to 60 HP, using a clamp-on, universal quick attach, or Euro Hitch is recommended. These blades also come with manual angling and different size blade options.
For skid steers and larger loaders from 60 HP and up you can get hydraulic angling. You can also choose from several different blade sizes for these machines. If you’re not sure what snow blade size you want, refer to the owner’s manual for recommendations and any restrictions.
Front or Rear Blade Plowing
One thing you need to decide before you get started is whether to have the blade in the reverse or forward position. A blade in the forward position (facing the back end of the tractor as it moves forward) is an aggressive way to move snow. A blade in the reverse position (facing away from the tractor as it moves backward) is less aggressive, which is better suited for driveways and parking lots.
Once you have decided on the blade position, check your blade angle. Regardless of whether you’re plowing in the reverse or forward position, the angle you’re going to push the snow out (angle of discharge) will determine how much snow you can move during each pass. A more aggressive blade angle usually means less control and the more likely snow will build up and not go where you want it to go.
Safety First
The first thing you should know before you even get started with installation of your snow blade installation is, at minimum, a two-person job. So, start calling in a few favours with friends and/or family to enlist their help. Since safety is going to be your first consideration, make sure you wear a good pair of heavy-duty work gloves and some eye protection. Prior to the installation, set aside some dedicated time to complete the job and try to avoid any distractions. Next, you’ll need to disconnect all power, especially the spark plug and battery from the tractor. This will ensure no electricity is flowing through the tractor while you are trying to install the snowblade. You want to make sure the tractor won’t accidentally turn on and potentially cause injury while your hands are in the mower deck.
Manufacturer Support
- Owner’s Manual – Although you will have the owner’s manual to guide you, you may find some of it confusing (depending on how well you interrupt technical instructions). Nevertheless, keep it handy during the installation to reference throughout the installation process. If for some reason you misplace the manual, you can find one and download one from the manufacturer’s website.
- Customer Support – Either in the manual or online, you should find a customer support number. If necessary, speak with a company representative about any concerns you might have during the installation process. They should be able to point you in the right direction and provide you with information about maintenance.
Detach Mower Deck
First, make sure your tractor is on a level surface before starting installation of the snow blade. Then safely lower the mower deck. Next, remove the attachment bar(s). It should be noted that to remove the deck from the PTO, you may need to disengage it from the drive shaft (refer to the owner’s manual for specific instructions). Once everything is disconnected, slide out the mower deck from under the tractor.
Put on Tire Chains
Put the chains over the tires and allow them to hang down the front and back. Secure the locking mechanisms that lock the chains in place on the inside and outside of the tire. Adding tire chains to the back tires of your tractor will add weight, which should improve traction on snow- and ice-covered roads. This added weight and better traction is important when you consider you will be moving mounds of snow from place to place.
If traction is an issue, consider locking the differential. This will allow both rear tires to move on the same rotation, which can help improve traction. Also make sure that the tractor is in four-wheel drive. If you’re still having traction issues, you may want to consider adding more weight (filling your tires is an option).
Fasten the Blade
The first step of fastening the blade is attaching the plow bracket to the front of your mower. You should reference your owner’s manual to determine which parts to use and if your model requires installing a subframe, which is common for certain types of tractors. Next, you will raise the plow onto the brackets and secure the blade. As mentioned, this is where two or more sets of hands are needed (this is more than a one-person job). Last, connect, or re-connect any hydraulic hoses. Once this is complete, check each hose to make sure they are connected securely.
Test Drive
In order to make sure that all parts are properly secured in place, you should inspect your work by using the manual or hydraulic lift mechanism to raise and lower the blade up and down a few times. Once you’ve completed this step, it’s time to test drive the tractor. Drive it back and forth several times to check the chains and newly installed plow. For safety reasons, while you’re conducting the test drive, make sure the kids and pets are kept indoors.
Learn Pro Plow Snow Techniques
Now that the installation process is done, do a second check of everything before you actually begin plowing snow. If you’re comfortable that everything is working properly, all you need now is some snow.
Adding a snow blade to your tractor is a great way to be proactive about snow removal. Plowing your street and driveway, and helping out your neighbours, is a great feeling. However, even plowing snow with a tractor requires time and effort. If you’re not comfortable plowing snow yourself or need some advice on plowing techniques, The Ground Guys can help. To learn more about the services we offer, visit us here or give us a call.