 Click to call
How to Transplant Shrubs
Whether you’re transplanting shrubs out of necessity or personal preference, you can minimize the stress on the plant and maximize your satisfaction by taking the necessary precautions throughout the process. The Grounds Guys are here to help, with a step-by-step guide to help you learn how to transplant shrubs safely and efficiently to ensure they survive.
When to Transplant Shrubs
In addition to choosing a spot where your plants will thrive, it is equally important to choose the right time of year to transplant them.
While certain species may have unique requirements, including flowering stages, in general, fall to early winter or early spring are the best times of the year to perform this task. Planting at the beginning of the growing season allows the shrubs ample time to establish and strengthen their root systems before temperatures begin to rise in the summer months.
Avoid uprooting your plants during the heat of the summer months when they are most likely to exhibit signs of stress, or during the winter months when the ground may be too hard to work or covered in snow for the northern part of the US or Canada.
How to Transplant Shrubs
You will need:
- Tape measure
- Gloves
- Tarp
- Shovel
- Compost or fertilizer
- Root hormone
- Garden hose
- Burlap
Step One: Choose your new location.
Ensure that the new location will meet the needs of your shrub, providing adequate sunlight, ideal soil conditions, and ample space to grow.
Step Two: Measure the root ball.
Calculate the approximate size of the root ball by doing some exploratory digging around the perimeter of the shrub, starting at the outermost tips of the branches.
Step Three: Dig the new hole.
Dig a hole that is twice the diameter of the plant's root ball and an equal depth, making sure this task is completed before digging up the shrub.
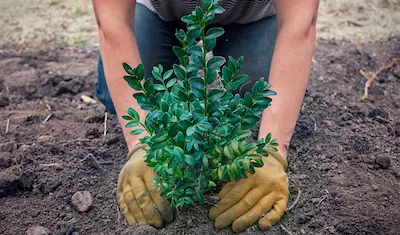
Step Four: Extract the shrub.
Lay the burlap next to the shrub. Dig around the perimeter of the shrub and take note of where the bulk of the roots reside, aiming to keep as much of the root ball intact as possible. Depending on the size of the shrub, you will likely require assistance as you attempt to free the base of the plant from the soil below.
Step Five: Transport the shrub.
Carefully tilt the shrub onto the moist burlap and gently wrap the roots carefully. Carry or slide it over to the new location by hand or use a wheelbarrow or dolly if too heavy. Alternatively, you may choose to carry the shrub by the root ball with the help of a family member or friend.
Step Six: Replant
Place the shrub in the center of the hole with the burlap intact, holding it upright and checking to ensure the height matches that of the previous location. Add the soil that was dug as the backfill, compact it firmly, and water it well as you go along. The burlap should not be disturbed and planted with the plant to hold the roots in place.
Step Seven: Pamper your plant.
Water the shrub frequently for the next two to four weeks, and as needed to keep it evenly moist. Apply mulch to help keep the soil temperature even and reduce water loss.
If you are planting trees as part of your landscaping project, be sure to read our do's and don'ts of tree planting before you begin.
Transplanting shrubs can give your yard a whole new look, and may even create room for a new patio, deck, or water feature. Curious how much that new deck might cost? Mr. Handyman® can help shed some light on the average cost of building a deck across the nation. For all your other landscaping needs, you can count on the professionals at The Grounds Guys for expert service and advice. Call us today at (888) 929-8188 or contact us online to schedule an appointment or to request an estimate for landscaping services.